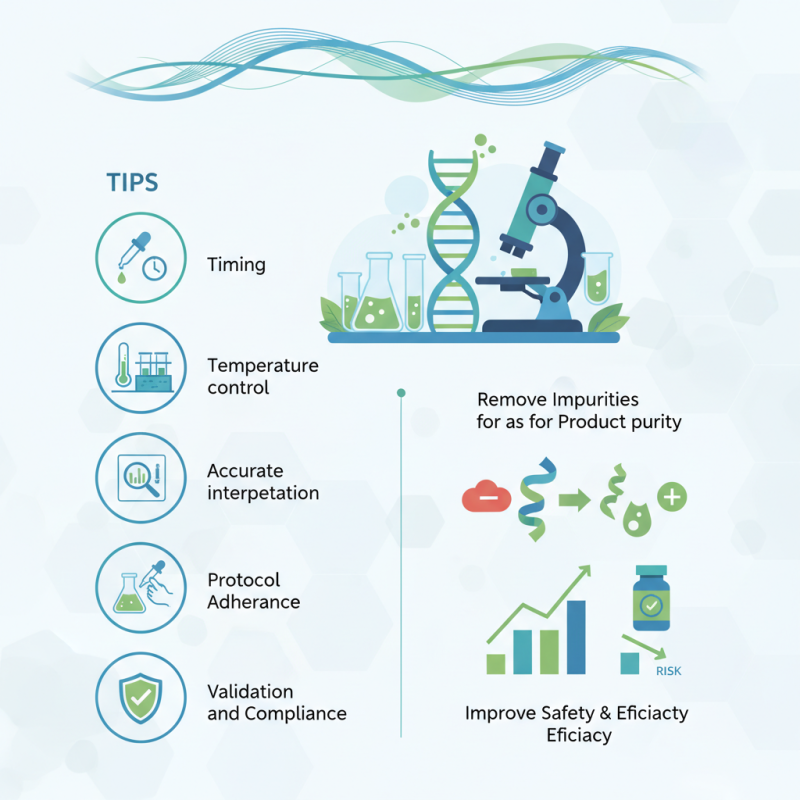
Top 5 Tips for Using Residual Protein A Detection Kit?
In the biopharmaceutical industry, purity is paramount. The use of a Residual Protein A Detection Kit has become essential for ensuring product safety and efficacy. According to a recent industry report, residual proteins can compromise therapeutic protein quality, leading to serious implications for patient safety. Such contaminants can account for significant losses in yield and effectiveness of bioproducts.
The Residual Protein A Detection Kit offers a reliable method for quantifying Protein A levels in biologics. This capability is critical, as research shows that even trace amounts of these contaminants can provoke adverse immune responses. Notably, a study indicated that over 25% of biopharmaceuticals face regulatory challenges due to impurities. This emphasizes the importance of proficiently utilizing detection kits to meet rigorous industry standards.
However, achieving optimal results with the Residual Protein A Detection Kit requires nuanced understanding and careful application. Missteps in procedure or interpretation of results can lead to misleading conclusions. Therefore, practitioners must remain vigilant and continuously reflect on their methodologies to ensure compliance and product integrity.
Understanding the Basics of Residual Protein A Detection Kits
Residual Protein A Detection Kits are vital for assessing the purity of therapeutic antibodies. These kits help to detect low levels of residual protein A after purification processes. According to a report from BioPharm International, up to 20% of the total production costs can be attributed to purification steps. Therefore, understanding how to effectively use these detection kits is crucial.
One key aspect of these kits is their sensitivity. Many assays can detect as little as 1 ng/mL of protein A. This level of detection ensures that even trace amounts won't compromise product quality. However, some users report inconsistencies. These can stem from variations in sample handling or differences in detection protocols. Each step must be meticulously followed to ensure reliability.
Moreover, it is important to calibrate the detection kits periodically. Some studies indicate that improper calibration can lead to deviations of up to 25% in results. This highlights the need for regular checks and balances. Users must prioritize training and adherence to protocols. Engaging in continuous education on advancements in detection technologies can also enhance reliability and accuracy.
Top 5 Tips for Using Residual Protein A Detection Kit
Steps for Proper Sample Preparation for Effective Detection
Proper sample preparation is crucial for effective use of a Residual Protein A Detection Kit. Start by ensuring that your samples are free from contaminants. This can significantly impact detection accuracy. Use sterile techniques to minimize the risk of introducing unwanted proteins. Additionally, always include a control sample. It helps validate the results and ensures the kit's reliability.
Next, consider the dilution factor of your samples. Overly concentrated samples can lead to false readings. Aim for a balance that allows the kit to operate within its optimal range. Mixing the sample gently can also aid in achieving uniformity. Remember, vortexing too vigorously can cause denaturation of proteins.
Moreover, proper storage conditions are vital. Keep samples at the recommended temperatures to maintain integrity. A breach in storage could compromise results. Lastly, document each preparation step. Review your procedures regularly. Reflecting on past experiments can enhance your skills and improve outcomes. This diligent approach can be the key to mastering the use of detection kits.
Top 5 Tips for Using Residual Protein A Detection Kit
| Tip | Description | Example |
|---|---|---|
| 1. Sample Dilution | Dilute the sample to the optimal concentration to reduce matrix interference. | 1:10 for serum samples. |
| 2. Buffer Selection | Use an appropriate buffer that maintains protein stability and detection efficiency. | PBS or Tris-based buffers. |
| 3. Incubation Time | Optimize incubation time for the kit reagents to ensure complete reaction. | 30 minutes at room temperature. |
| 4. Temperature Control | Keep samples and reagents at recommended temperatures before and during the assay. | Store reagents at -20°C. |
| 5. Control Samples | Include positive and negative controls to validate assay performance. | Use known concentrations of Protein A. |
Optimizing Assay Conditions for Accurate Results
When using a Residual Protein A Detection Kit, optimizing assay conditions is crucial for obtaining accurate results. Start by carefully evaluating sample quality and concentration. Impurities can interfere with binding, leading to false positives or negatives. Regularly calibrate your equipment to maintain precision.
Temperature and time are also critical factors. Conduct experiments under controlled temperature settings. Too high or too low can alter protein structures, affecting binding efficiency. It's important to test reaction times; sometimes, shorter or longer incubations yield better results.
Using appropriate buffers can significantly impact assay performance. Ensure buffers are compatible with the kit to prevent unexpected reactions. Regular troubleshooting of your protocols is necessary. Look out for inconsistencies in results, as they could signal underlying issues. Reflect on each step, and adapt your approach when necessary.
Interpreting Data: Evaluating Residual Protein A Levels
Interpreting data from a Residual Protein A Detection Kit requires careful evaluation of the results. It’s essential to understand the baseline levels of residual Protein A in your samples. This information establishes a reference point for your measurements. Variations can happen due to sample preparation methods or the conditions under which the experiment was conducted. Each of these factors can significantly impact your readings.
A thorough analysis of the data involves looking for trends rather than just individual results. For instance, consider how changes in purification protocols affect residual Protein A levels. Small changes in methodology might lead to unexpected results. Reflect on whether the detected levels align with your expectations or if they suggest hidden issues in your process. Anomalies should prompt a re-evaluation of both the data and the procedures you employed, serving as learning opportunities for future experiments.
Additionally, employing controls can enhance the reliability of your findings. Controls allow you to compare results and reinforce the validity of your interpretations. Think critically about how the detected levels of residual Protein A correlate with the overall quality of your product. This evaluation not only helps in achieving compliance but also promotes continuous improvement in your workflows.
Best Practices for Kit Storage and Shelf Life Management
When using a Residual Protein A Detection Kit, proper storage and management of shelf life are crucial. A consistent temperature is essential. Store the kit in a dark, cool place. Temperature fluctuations can degrade the reagents. Ideally, a refrigerator set at 4°C is best. Regularly check the expiration date printed on the packaging. Expired components can yield unreliable results.
Consider organizing your workspace. Label storage areas clearly. This practice helps in monitoring the kit's condition. It’s easy to overlook minor details, leading to wasted time and resources. If you open the kit, try to use it promptly. Oxygen exposure can cause reagents to lose their effectiveness. Keep track of when each component was opened.
Maintain a log for inventory. Document storage conditions and any changes made. This will aid in troubleshooting any issues that arise later. It’s a simple method, but essential for reliability. Reflect on your storage practices regularly. Set reminders to assess both the kit and the storage environment. Small failures can impact larger projects significantly.
